
It might look complicated because of how long the pattern is but it's not really just a lot of pieces So dive in ♥

Materials
- Small Amount of Lions Brand or any chunky yarn in color of hat choice
- small amount of Red yarn for nose
- small amount of worsted weight yarn for horns (I used Caron's in cream)
- 6.50 mm hook (K)
- 4.25 mm hook (G)
- 3.75 mm hook (F)
- Buttons for eyes and/or nose
- yarn scraps or poly for fill
- daring needle for sewing
- Thread/Embroidery floss for eye buttons or appropriate for button holes
Ch-chain
Sc-single crochet
Dc-double crochet
Slst- slip stitch
Rnd/s- round/s
Tc-treble crochet
Size: 0-3 months
Hat:
~Slip Stitch at the end of each round to join~
MagicCircle ch 2, 10 dc in ring. Pull tight slst to join
Rnd 2: Ch 2, dc in same space, 2 dc in each stitch around (20)
Rnd 2: Ch 2, dc in same space, * 2 dc in next st, 1 dc in next st * repeat * to * until end of round (30)
Rnd 3: Ch 2, dc in same space, * 2 dc in next st, dc in next 2 st * repeat * to * until end of round (38)
Rnd 4 - 7: Ch 2, dc in each st around. FO You can make hat longer for a roll up brim or shorter for no brim
Base Point: With 3.75 hook (F) Start with a Magic Circle. ch 1, 11 sc inside ring pull tight, slst to join. (Mark slst with a stitch marker or piece of contrasting yarn if needed)
Rnd 2-9: Sc around for 9 continuous rounds (without joining) (make sure your last stitch of rnd 9 lines up with the stitch marker from MC round to ensure 9 full rnds.)
*At he end of round 9 you will start working back and forth*
Rnd 10: ch 1 turn sc in same st, sc in next 3sc, slst, the next 3 sc, sc in next 4 sc. Slst to ch1 of this rnd to join.
Rnd11: ch 1 turn sc in same st, sc in the next 2sc, slst in the next 4 st, sc in the next 3 sc. Slst to join.
Leave a long tail for sewing Pull yarn through last stitch
Small Point- is worked as the base point above with a count of 8 sc to start and continues 8 rnds then is worked back and forth
Magic Circle. ch 1, 8 sc inside ring pull tight, slst to join. (Mark slst with a stitch marker or piece of contrasting yarn if needed)
Rnd 2-8: Sc around for 8 continuous rounds (without joining) (make sure your last stitch of rnd 8 lines up with the stitch marker from MC round to ensure 8 full rnds.)
*At he end of round 8 you will start working back and forth*
Rnd 9: ch 1 turn sc in same st, sc in next 2 sc, slst the next 3 sc, sc in next 3 sc. Slst to ch1 of this round to join. Leave a long tail for sewing Pull yarn through last stitch
With hook 4.25 (G) hook
Nose: Magic circle ch1, 8 sc in ring pull ring tight. Slst to join.
Rnd 2: ch 1 turn 2 sc in each sc around slst to join * Leave long tail for sewing
~you can make nose larger or smaller by reducing the stitch count or by using a smaller hook size~
With 4.25 (G) hook
Ears: make 2 size
Round 1: Macig Circle, ch 3. 11 dc. Slip stitch to join.
Round 2: Ch 3. In next dc, make 2 dc, 1 tc, and 2 dc. Dc in next 5 dc. In next dc, make 2 dc, 1 tc, 2 dc. Dc in next 4 dc. Sl st to top ch of ch 3. Finish off.
Round 2: Ch 3. In next dc, make 2 dc, 1 tc, and 2 dc. Dc in next 5 dc. In next dc, make 2 dc, 1 tc, 2 dc. Dc in next 4 dc. Sl st to top ch of ch 3. Finish off.
Assembly:
The ends of both points should be at an angle. Stuff small point with some scrap yarn be careful not to over stuff.
Attach small point to base point with short side of small point at the top inside of base point angled down between rows 5 and 9 (there should be 5 rows above the short point and 3 below it)
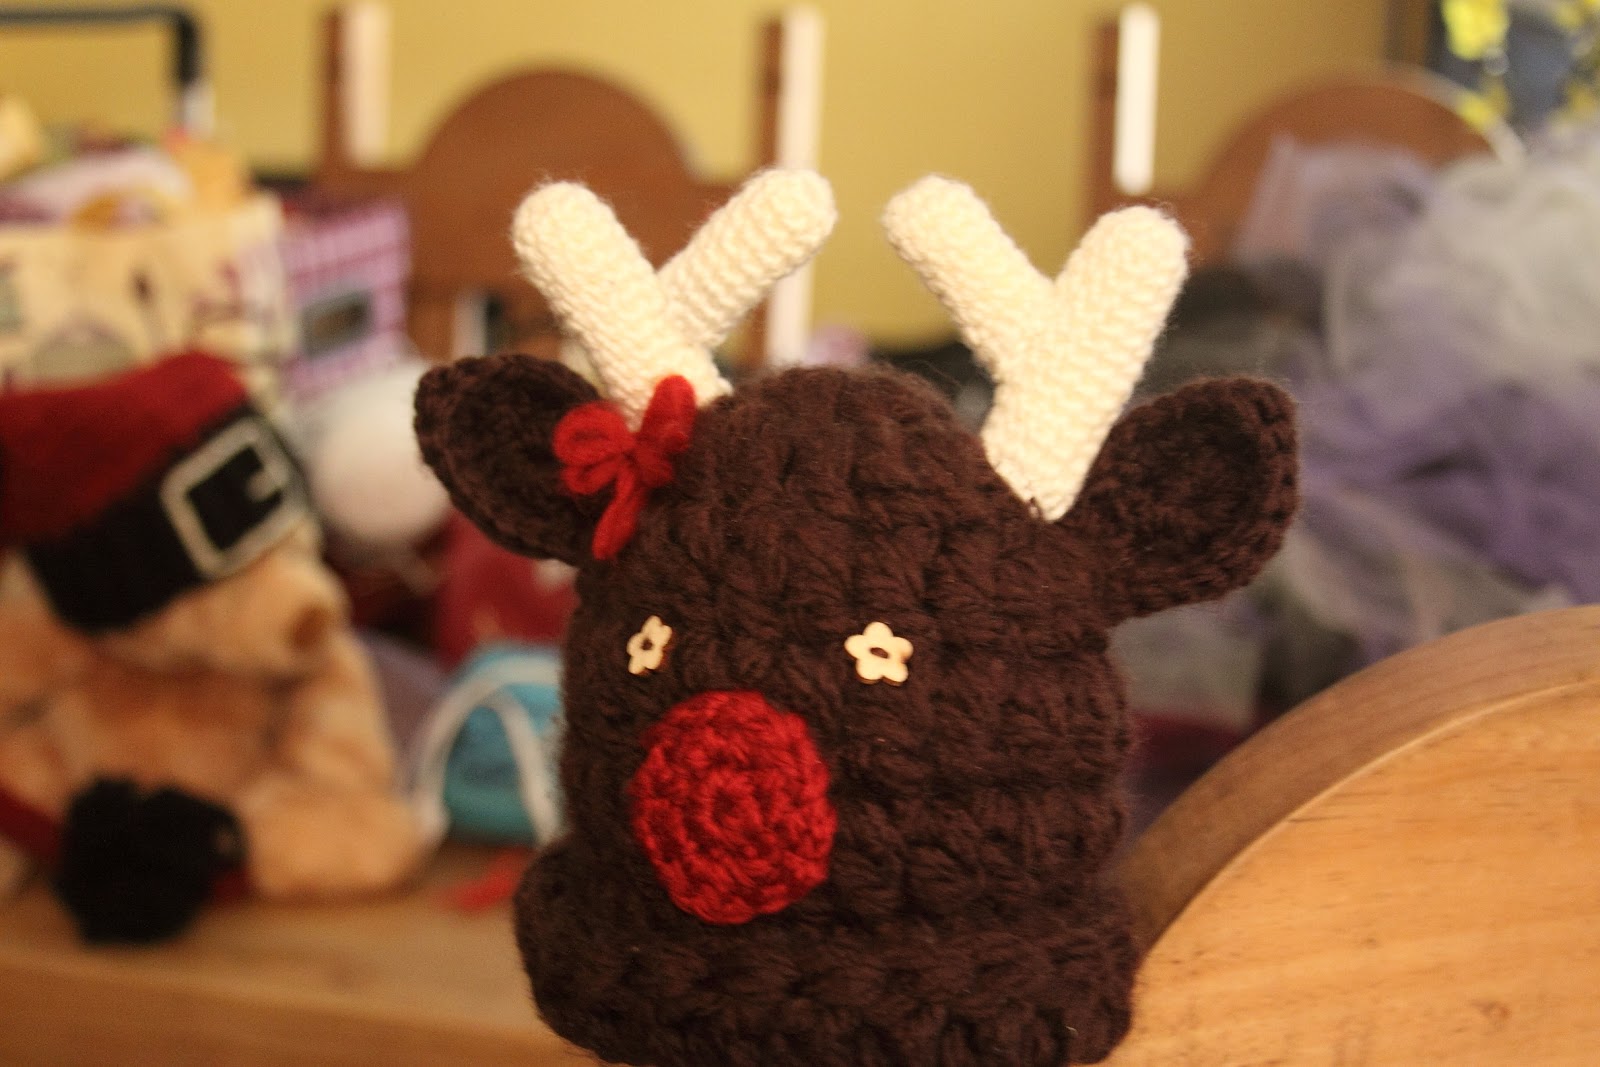
Now with horns assembled stuff the base horn (be careful not to over stuff) With hat laying flat place bottom of horn base on each side of hat at about row 2 (inside points of horns should almost touch).
Now place one end of ear right behind horn again with the second ear. Arrange nose and eyes, remember or take a picture of the placement. Ok it's time to start sewing....I used a daring needle and the yarn I used for the hat to attach the horns and ears. Thread for eye buttons I struggled at first when it came to sewing pieces together but a stop by this site. Planet June and ~~wah lah~~ Amigurumi pro! Well novice really. This site is so amazing with so many helpfully tutorials and lots of patterns so go check it out! ☻
~Buttons of your choice for eyes you can also choose to use a button for the nose as well. Arrange pieces on hat an sew on ~
I tied a bow out of yarn or ribbon and hot glued it to a metal clip or bobby pin for easy add/removal

***Please consider making one for charity***
©2012 Random Tangles. All Rights Reserved. You may sell any items made from this pattern. Please do not sell the pattern or claim it as your own. If you sell items please link back to this pattern. You may post a link to the pattern but you may not re post the pattern in whole or in part.

